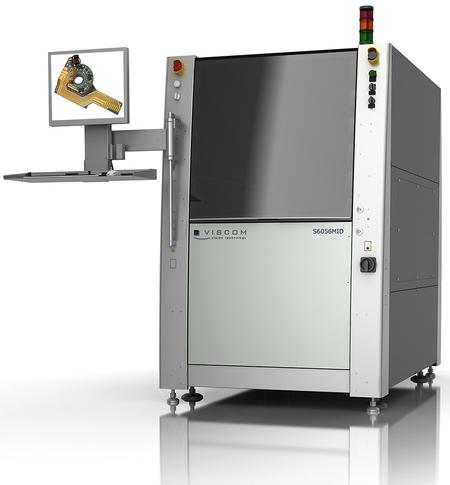
Three-dimensional (3-D) MID products are finding ever-widening applications, especially in the automotive industry. These 3-D electronics assemblies are used when small dimensions are required and the circuits must be optimally fit into a product. In order to ensure 100 percent quality here as well, Viscom has developed an inspection system that inspects these electronics assemblies fully automatically, with short cycle times and high inspection depths.
For more than 25 years, Viscom has developed systems and solutions for optical and X-ray inspections. Since then, the company has become the European market leader for inspection of electronics assemblies and is at the forefront worldwide. This longstanding experience with widely differing applications enables synergies that Viscom realizes as new inspection solutions for its customers, such as its newest inspection system, S6056 MID.
In general, the inspection tasks involving 3-D MID electronics assemblies can be subdivided into two inspection steps: inspection after manufacture of the 3-D MID carrier and inspection after manufacture of the entire 3-D MID product. Typical defects after the carrier is manufactured can include extraneous metallization deposition (especially with the LDS process) as well as separation, short circuits or cracks in the circuit tracks. The AOI system also inspects the circuit tracks for completeness and crucial geometry and color characteristics.
After the entire MID product has been manufactured, the components are checked for presence, polarity, correctness and position. Among other defects, inspection of the solder joints covers tombstones and short circuits. The characteristics of the solder joints on the circuit track also are checked to eliminate defects, including missing solder resist.
In order to meet these requirements, the inspection system has been equipped with the well-proven high-performance Viscom 8M camera technology. The inspection tasks entailed by MID construction and connection technology are carried out with standard resolution and after metallization, in high=resolution mode. If conductive adhesive is used in addition to solder paste, color camera technology also comes into play. For wirebond applications, it is possible to apply the tried and tested Viscom wirebond camera technology with resolution from 2.5 to 5 μm/pixel. With it, all current thin bond wires can be inspected. As a result, a range of electronics assembly layouts can be covered, facilitating effective, reliable quality control.
An additional unique feature of 3-D MID products is that the individual inspection objects are positioned on different levels. In order to also guarantee reliable inspection under these conditions, angular inspection is used. With it, even hidden areas can be reliably checked. To ensure the object being inspected is viewed with the correct depth of focus even at different heights, the camera head can be moved along the Z-axis.
One other aspect during development of the inspection system S6056 MID was finding a solution for handling the 3-D circuit assemblies, which are characterized by widely varying forms and contours. In many applications the devices are transported in custom designed trays or pallettes. In addition to the single track solution, Viscom also offers throughput-optimized double track transport and customer-specific solutions.


.gif)


