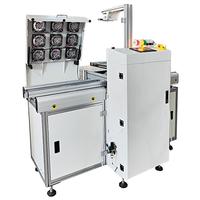
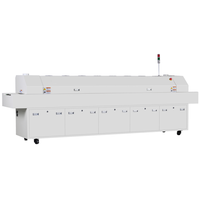
Soldering PCB Rework Conveyor
Company Information:

Name: |
Soldering PCB Rework Conveyor |
Category: |
|
Offered by: |
|
Soldering PCB Rework Conveyor Description:
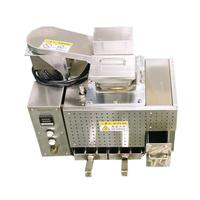
Soldering PCB Rework Conveyor
1. Modular design
2. Weighted design improves stability
3. Smooth and parallel width adjustment (screw)
4. PCB detection mode
5. Customizable equipment length
6. Adjustable transport speed
7. SMEMA
8. Motor drive
9. Highly sensitive “OMRON”
10. Add further rework fans, in chain transportation
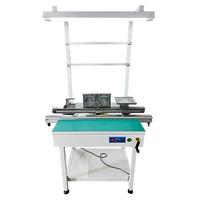
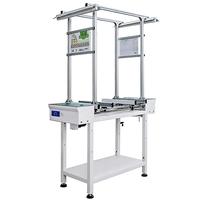
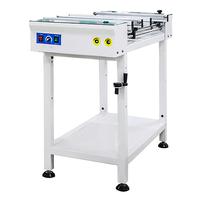
Soldering PCB Rework Conveyor
Specifications of Soldering PCB Rework Conveyor
| Specification | RC-350W | |
| Power supply | AC 220V/ 50/60Hz | |
| PCB size (mm) | 400*50~350 (Length~Width) | |
| Transport direction | Customize left to right or right to left | |
| Trick fixed side | Front side or back side | |
| Transport speed | 1-12m/min adjustable | |
| Transport height | 900 ± 20 mm | |
| Main motor power | 15W | |
| Machine size | 500*665*920 | |
| Weight (kg) | 40 | |
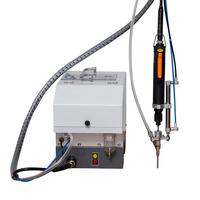
PCB Soldering rework process
Occasionally, there will be some processing defects or bad phenomena that we don’t want to see in the production process of SMT chip processing. We can’t let the problematic PCBA products flow into the next processing link or even leave the factory. Next, SZTech-SMT will introduce the SMT patch processing and rework process for you.
PCBA desoldering and disassembly
1. Remove the PCBA coating layer first, and then remove the residue on the working surface.
2. Install a hot clip soldering iron tip with a suitable shape and size in the hot clip tool.
3. Set the temperature of the soldering iron tip at about 300°C, which can be changed as needed.
4. Apply flux to the two solder joints of the chip components.
5. Use a damp sponge to remove oxides and residues on the tip of the soldering iron.
6. Place the tip of the soldering iron on the top of the SMT component, and clamp the two ends of the component in contact with the solder joint.
7. Lift the component when the solder joints at both ends are completely melted.
8. Place the removed components in a heat-resistant container.
PCBA pad cleaning
1. Choose a chisel-shaped soldering iron tip, and set the temperature at about 300°C, which can be changed appropriately according to needs.
2. Apply flux to the pads of the circuit board.
3. Use a damp sponge to remove oxides and residues on the tip of the soldering iron.
4. Put a soft solder-absorbing braid with good solderability on the pad.
5. Gently press the tip of the soldering iron on the tin-absorbing braid. When the solder on the pad melts, slowly move the tip of the soldering iron and the braid to remove the residual solder on the pad.
PCBA assembly and welding
1. Choose a soldering iron tip with a suitable shape and size.
2. The temperature of the soldering iron tip is set at about 280 ℃, which can be changed appropriately according to the needs.
3. Apply flux to the two pads of the circuit board.
4. Use a damp sponge to remove oxides and residues on the tip of the soldering iron.
5. Use an electric soldering iron to apply an appropriate amount of solder on a pad.
6. Clamp the SMT chip components with inserts, and use a soldering iron to connect one end of the components to the tinned pads to fix the components.
7. Solder the other end of the component to the pad with a soldering iron and solder wire.
8. Solder the two ends of the component to the pad respectively.
Soldering PCB Rework Conveyor was added in Jul 2023
Soldering PCB Rework Conveyor has been viewed 110 times
20 More Products from SZTech-SMT Firm :


.gif)

