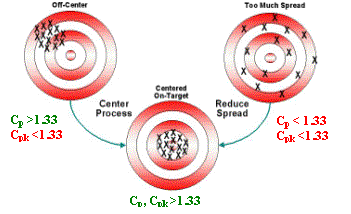
Knowing the capability coefficients, it is possible to estimate the defect rate of the measured machine. For example, Cpk = 1.33 means a defect rate of 60 parts per million (PPM) and also indicates that a 4 Sigma machine capability has been achieved. But this theoretical model works only if the sample exactly fits the normal distribution up to edges of the distribution. The general tendency does not depend on the distribution. That means high Cpk values guarantee low defect rates. Typically, a Cpk of 1.33 or higher is necessary to guarantee a stable machine within the specifications. Using IPC-9850, manufacturers must give placement equipment accuracy like ��� a ���m at ��� ß Sigma for X, Y and q.
 Fig. 4: Objective
Finally, the objective for both machine capability and calibration is to identify and reduce machine/process variation and defects.
Today, the "performance" of given equipment is controlled and sustained by its users. For this, multiple tools are available on the market. The most commonly used are CMMs (Coordinate Measuring Machines). They can be used for different types of dimensional measurements in electronics manufacturing. Applications include solving dimensional mis-registration issues, qualifying incoming supplier parts and monitoring machine capability.
Unfortunately, the majority of these measurement systems are not designed to be used in an industrial mode. Supporting reasons include:
- Specific measurement programs need to be developed.
- Dedicated tools need to be purchased or developed.
- Statistical analysis using Excel or SPC programming can be very time consuming and often require an expert to use a CMM.
- CMMs are made to work in a clean and temperature controlled room and therefore cannot be used directly on the production floor.
A complete measuring system dedicated to machine capability measurement is available today. This paper will describe in detail our experience with such a piece of equipment.
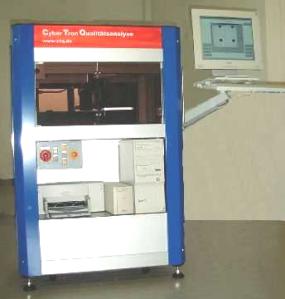
The Cm System is a mobile measuring system which can be used directly on the production floor to evaluate the ability of a machine to produce quality. This applies to all SMT systems such as placers, dispensers, and solder paste printers.
- Minimize the dimensional errors associated with epoxy boards or real components, and
- To provide accurate and relevant measurements.
Dummy components are mounted on the glass plate in the placement machine. The assembly is then inserted into the Cm System which measures the positional placement accuracy and evaluates the results. Dummy components are measured using a program defined by the Cm System, taking into consideration the impact of placement order, the number of nozzles, heads, rotation, and machine specifications, etc.
After the measurement is completed, the system issues a report that groups the results statistically. Graphical analysis tools make it easy to evaluate how the machine functions. The report includes not only the measured Cp and Cpk indices but also detailed information as to where problems occurred, allowing better identification of their root causes.
 Fig. 5: Cm System
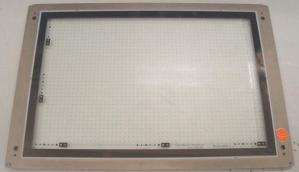
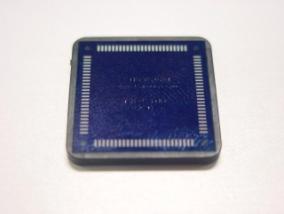
The system has an integrated electric wheel lift system which allows it to be moved easily on even floors. Thus, machine capability measurement can take place directly on the production floor to minimize glass plate handling. It is recommended that the system be calibrated monthly and following each equipment transfer. This ensures the stability and accuracy of the system. Figures 6 and 7 shows the glass plate and a dummy TQFP100 glass component.
 Fig. 6: Glass plate for the Cm System
The glass plate (9.0in x 13.4in) was delivered with a calibration certificate (NIST like) from an official European metrology laboratory. The same glass plate was used for all the capability tests (glue dots, printed deposits and placed components).
 Fig. 7: TQFP100 Glass component
These components are made of extremely thin glass and are very accurate (accuracy of the fiducials ��� 0.5 ���m). Each component is serialized and their accuracy is ensured with a calibration certificate.
A glue spray is used to hold the test parts on the glass plate during machine placement. This solution is very convenient for the machine capability tests. There is no problem with background noise caused by air bubbles or unevenness. The glue deposit is homogeneous and thinner than adhesive tape and can be used for up to 20 measurements.
After simulating movement conditions or temperature changes, the results are the same. From our experience, a spray adhesive is stable enough for these measurements.